The first thing to mention is that there are 3 types of astrophotography:
- widefield / landscape;
- solar system; and
- deep sky.
Each of these types will require vastly different equipment and techniques, as well as software and technique for post processing. I'll be covering each of these 3 types and what is required to get the best results.
Widefield / Landscape
This type of astrophotography is generally the most simple concept of the three. You can do this with just a camera and tripod. You basically frame a terrestrial target with the starry sky as a backdrop and take a picture. Or perhaps you want to point your camera upwards and get just a star field shot and not have a terrestrial target in view. Using this technique is how you shoot the Milky Way or Aurora Borealis.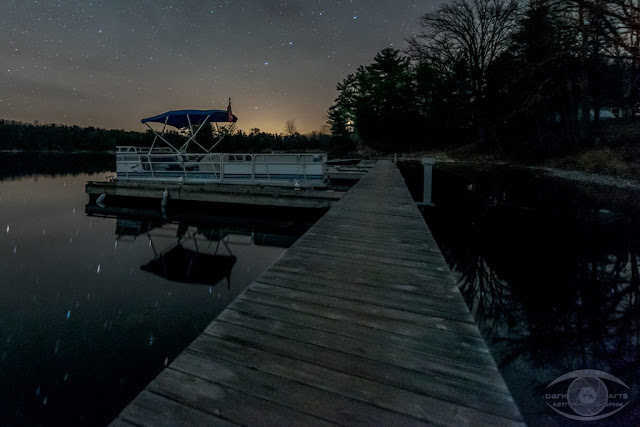 |
| Widefield image shot with a DSLR on a tripod |
Solar System
This type of photography is exactly what it sounds like. You're taking pictures of objects in the solar system. This will include the moon, the sun (ONLY with the proper protective filters!!!), and planets. It can be a very rewarding pursuit in its own right. But it's also where your equipment requirements increase significantly.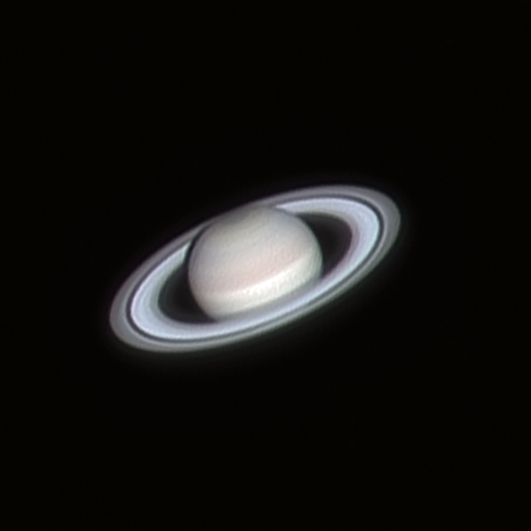 |
| Saturn shot through an 8" Meade LX90 with 3x barlow using a ZWO ASI120MC-S colour camera |
In order to effectively image solar system objects, you'll need:
- telescope;
- sturdy mount (preferably motorized with tracking);
- solar filters if imaging the sun;
- planetary imaging camera; and
- a computer.
Unlike other types of astrophotography, you don't actually take pictures when shooting solar system objects. While you can take images of the moon with a DSLR, typically, a video camera is used to shoot video of the object. In post-processing, software will deconstruct your video into individual frames that will then be stacked to enhance detail and give you your final image. For more information on solar system image stacking, you can refer to my "Lunar image stacking. Is it worth it?" article.
Telescope
For this type of imaging, a telescope is required. The ideal telescopes for solar system imaging will have a long focal ratio of f/10 or greater. The higher the f/ value, the more magnification you get. While normally magnification power is the least important aspect of a telescope, all but the moon and sun will be nothing but dots of light in the sky, you need to have a telescope with a decent aperture and good magnification in order to make these celestial bodies large enough to image.
Catadioptric designs such as Maksutov-Cassegrain are prized planetary and lunar imaging scopes due to their typical f/12 - f/15 focal ratios. Schmidt-Cassegrain models are also excellent solar system scopes due to their relatively large apertures and f/10 ratios. Other scopes such as refractors and reflectors can also be used, but most common ones have focal ratios of f/5 to f/7. However, there are many great refractors and reflectors that have f/9 and higher ratios that can also do the trick. Basically, any type of scope can be used for this, but some will perform better than others.
Mount
As with any photographic pursuit, what you mount your camera and lens on needs to be sturdy. Whether you're using a simple camera on a tripod or have a huge array of telescopes on a large mount, having a sturdy mount whose weight rating exceeds the payload you're mounting on it is essential to getting good results. Ideally, your mount should hold at least double the weight of the telescopes, cameras and other gear you'll be mounting to it for maximum stability. This will ensure that everything is stable and vibration free.Ideally, you want a motorized mount that's capable of tracking objects in the sky. With lower magnification, you can get away with a manual mount. But once you get into higher powers typically used for solar system imaging, objects will very quickly drift out of your field of view requiring you to stop imaging, reposition the scope and start again. While this can be done, it's not much fun. A tracking mount saves this hassle.
There are 2 types of mounts that you can get; altitude-azimuth (alt-az) and equatorial (EQ). Alt-az are simpler and cheaper. They track the sky using simple up / down (altitude) and side to side (azimuth) motions. They'll be able to easily track the moon, sun or planets. They're the easiest types of mounts to set up, align and use. The down side is that while they track the object, they do it with the Earth as a point of reference, so over time, you will see the object you're tracking rotate in your field of view. This is called field rotation. A series of images of a planet with distinguishable features such as Jupiter or Saturn will show this rotation over time. But for planetary imaging, this effect is negligible.
EQ mounts are more complex to set up and and align, and tend to be bigger and heavier since they require a heavy counterweight to balance out your load. But EQ mounts have some advantages over alt-az mounts. The central axis of rotation of the mount is aligned to the celestial pole which is just slightly off from Polaris, the north star. Once correctly aligned, an EQ mount only requires 1 of its axes (right ascension RA) to move to track the sky. And it does track the whole sky, not just the object, so field rotation is completely eliminted. Good EQ mounts also hold a far heavier payload than alt-az mounts, making them the preferred choice for both solar system and deep sky astrophotography.
Solar Filter
As the name implies, these are used when imaging the sun. The simplest ones are simple reflective mylar films that are mounted on the front of the telescope and produce white light images. They're quite inexpensive and easy to use. More expensive glass filters are available that will show the sun in various colours. For more advanced imaging applications, narrow band filters like Hydrogen Alpha will allow you to image convective currents on the surface of the sun as well as capture solar prominences. These latter filters tend to be extremely expensive.Camera
The dedicated cameras used for this type of imaging are high frame rate web cams. There are many companies that make said cameras and they're typically available for a couple of hundred dollars and up. It's also possible to modify a normal webcam for planetary imaging, although most will be limited to frame rates of 30 fps. However, considering how cheap webcams are, these are a great option for someone on a budget just starting out. There are many video tutorials available on YouTube that will guide you through removing the lenses on webcams to make them suitable for astrophotography.Computer
In order to capture the images, you'll need to have a computer available. In most cases, people will use laptops for this due to portability and power. You don't need anything ridiculously powerful to do this. If you have an old laptop, it will likely do just fine. Despite all my equipment, I use a 12 year old netbook as my field computer equipped with an SSD and it works great for this purpose. It's a little slow to boot and load my software, but once everything is running, it performs like a champ.To Mac users out there, you'll find very little astronomy software available. Pretty much all the good software is Windows only. So if you're running a Mac, running Bootcamp and Windows is highly recommended.
Deep Sky
This is potentially the most difficult and gear-intensive type of astrophotography. Deep sky objects include nebulae, galaxies and star clusters. It involves taking a series of long exposure images of your target that you later stack in software and then post process. In order to get good results, you need the proper equipment and great technique.Basic Imaging With A Tracker
First, I'll cover a basic setup that will get you very pleasing images using a DSLR or mirrorless camera with a tracking mount. This requires very little in terms of equipment and is ideal for someone who is just getting into astrophotography but doesn't want to invest into a lot of expensive equipment to start out. It will, however, mean that you need to be able to find objects in the sky that you can't see with the naked eye.All you need is your camera, a telephoto lens, a remote shutter release, a tracking mount, and a sturdy tripod and you're golden. This is probably the simplest way of getting into deep sky imaging. This type of deep sky imaging will give you wide fields of view capturing your target as well as a lot of the surrounding space. This is ideal for shooting large targets such as the Andromeda Galaxy, constellations, or large nebulae such as the Orion Nebula. While this won't get you up close and personal with other distant galaxies, planetary nebular and globular clusters, it will still give you some amazing images. Some of my best images have been shot this way using a 55-300mm lens at various focal lengths. You can also use wider angle lenses to track parts of the Milky Way, which will produce incredibly detailed images that are impossible to get with a camera on a tripod.
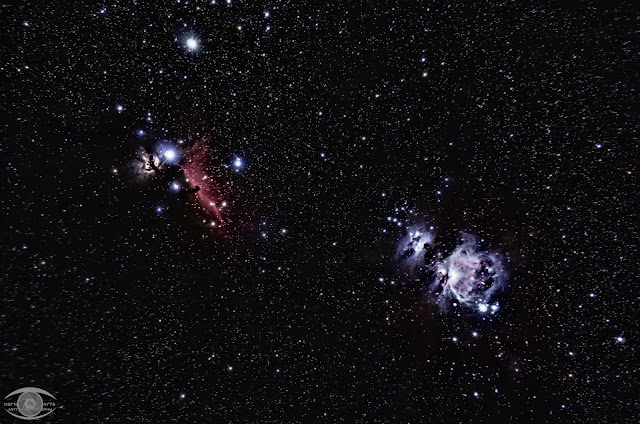 |
| Wide angle image shot with at 150mm on an iOptron SkyTracker |
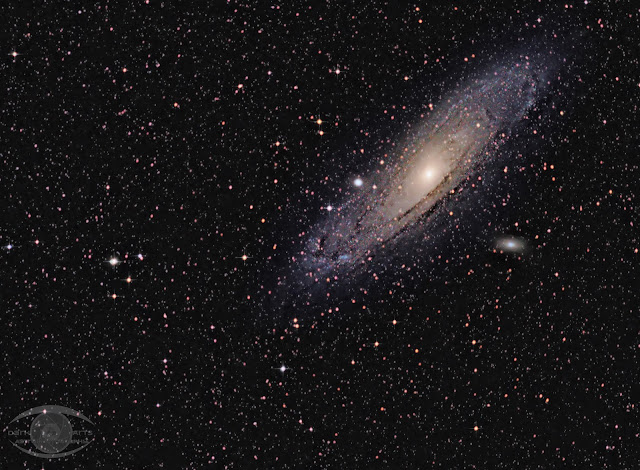 |
| The Andromeda Galaxy shot @ 300mm using the iOptron SkyTracker |
Camera
There's not much to say here. You need a regular DSLR or mirrorless camera. It's really that simple. Even an entry level DSLR will be suitable for this. As I always say, a better quality camera used can potentially produce better results, but with good technique, a solid mount and good optics, you can get incredible images out of any modern DSLR at any price range. As always, if you're purchasing a new camera, I would recommend going for more of an intermediate level camera, because you can quickly outgrow the capabilities of an entry-level camera.Lens
For this type of photography, almost any lens can be used, although you need to match the lens to your target. For example, imaging the Andromeda Galaxy or Orion Nebula will be best at 200-300mm focal lengths to capture the finer details in these objects. An image of the entire Orion constellation and the Orion Molecular Cloud Complex will require a wider angle lens.The point is, you can get away with using pretty much any lenses you already own for this. Like anything else in photography, good quality lenses will produce sharper images. Your lens will have more of an outcome of your final image than the camera will. If you can splurge for a more expensive ED lenses, then by all means do so. But don't let having "kit lenses" discourage you. Their optics will be fine for the job.
Tripod
This is one item that is often overlooked. Your tripod is the foundation on which everything else rests. It really doesn't matter if you have a $10 000 camera and lens combination. If your tripod is flimsy and sways in the slightest breeze, you won't be able to get a good end result, particularly in this type of photography where you'll be shooting exposures of 30 seconds to 3 minutes. You tripod's weight rating needs to exceed the total weight of your camera, your heaviest lens, and your tracker.Tracker
Once upon a time, the only way to take deep sky images required a bulky equatorial mount. These days, there are several options available for lightweight, portable sky trackers. Popular options are available from iOptron, Vixen and Sky-Watcher. These units aren't cheap, but cost a lot less than full size, motorized equatorial mounts. They all work extremely well for their intended purpose and I honestly don't know of any "bad" ones on the market currently. Let your wallet be your guide here.Deep Sky Imaging With A Telescope
Finally, we get to the one that everyone THINKS they want to do - imaging at prime focus with a telescope. This is easily the most complicated and most expensive type of imaging you can do. It required a lot of equipment (usually expensive), has a steep learning curve, and will cause some frustrations along the way. That said, to me this is also the most rewarding type of imaging and my favourite.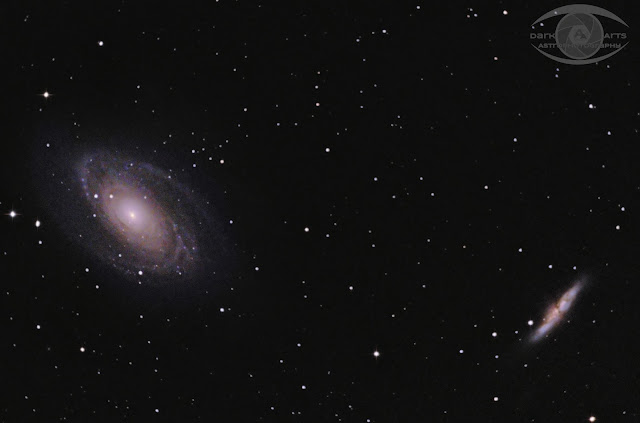 |
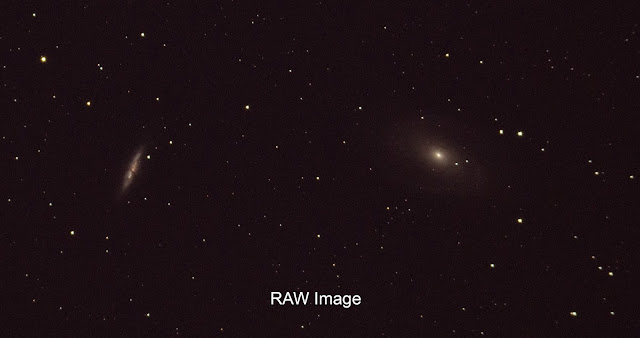
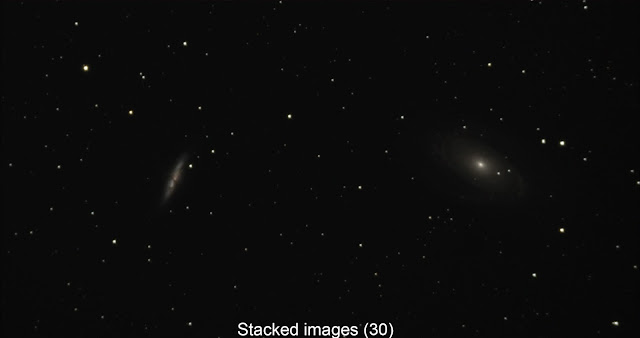
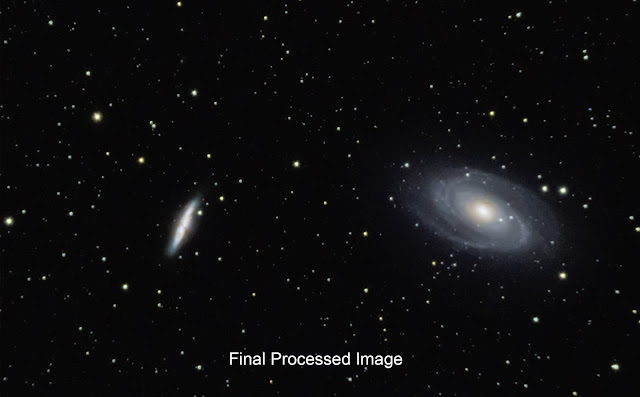
| M81 and M82 shot through an 8" Meade LX90 and a 0.63x focal reducer on an EQ mount with autoguiding. |
- imaging telescope;
- focal reducer, field flattener, coma corrector (depending on the scope);
- sturdy EQ mount (motorized and preferably with go-to computer);
- DSLR, mirrorless or dedicated CCD imaging camera;
- guide scope and camera;
- dew control (if you're in a humid climate);
- power supply
- a computer.
Imaging Telescope
This is your main telescope that you will be capturing your images though. There are many options available for deep sky imaging, but ideally, you'll be looking for a scope with a focal ratio of f/7 or less. High power is not required. Most deep sky objects are relatively small in the night sky, but unlike planets that appear as a dot of light, deep sky objects had a much greater apparent angular width. It's more important to have a fast scope with a low focal ratio than power.
Fast Newtonian reflectors are good deep sky imaging scopes. They have a wide aperture and will produce great deep sky images. However, most will require a coma corrector / field flattener to produce sharp, pinpoint focused stars across the field of view.
Catadioptric designs are excellent scopes for this type of imaging. They offer a wide aperture in a relatively compact size and weight and offer excellent views of deep sky objects. Schmidt-Cassegrain scopes are kind of the "jack of all trades" scope. Depending on the model your scope, attaching a focal reducer will reduce its focal ratio to f/6.3 to f/7. Some older, larger SCTs have a native ratio of f/6,3. Adding a reducer to those will lower you down to f/4, making it ideal for imaging.
Apochromatic refractors are a great choice for deep sky imaging, although usually come at a fairly hefty price tag for larger apertures or higher quality models. They will produce incredibly high contrast, sharp images of the night sky and are prized by astrophotographers for their ability to deliver amazing colour. Coma correctors are also usually required in models with ratios of f/6 or faster to maintain pinpoint stars across the field of view.
Mount
One again, I must stress that a sturdy mount is ESSENTIAL for long exposure deep sky imaging. Ideally, you want your mounts payload capacity to be at 1.5-2x the total payload you intend to mount on it. An EQ mount is a necessity for this type of imaging. Alt-az mounts can't handle exposures longer than 20-30 seconds due to field rotation.
Camera
There are really 3 options here; a DSLR, a mirrorless, or a dedicated CCD astro-camera. To use a DSLR or mirrorless, you'll need the proper T-mount and ring compatible with your camera model, and you attach the camera to the telescope in place of an eyepiece. The telescope then becomes a large telephoto lens for your camera. You can then control the camera either with a remote shutter control (either manual or programmable) or via a computer to capture your images.
Dedicated CCD imagers are also readily available, but tend to be quite costly. There are sub-$1000 models available, but they're generally not recommended as they will produce lower quality images compared to a DSLR. If this is what you want to do, then a colour model is recommended for beginners. For more advanced users, a monochrome version + filter wheel and associated filters are the ultimate setup. But this also tends to be very expensive, and the amount of work required for both image capture and post-processing increases tremendously.
Guide Scope and Camera
You may have heard the term "auto-guiding". What this means is that you have a second scope and camera attached to your mount along with your imaging scope with a separate camera to guide your main imaging scope. The second camera is a webcam style camera like a solar system imager. In fact, most dedicated solar system imagers come equipped with an ST-4 guide port and double as guide cameras.
Even though your mount may track the sky, small imperfections in gears will cause small deviations over time. Without correction, this will result in your stars looking like small hyphens or be oblong-shaped instead of round pinpoints.
Your guide camera locks onto a star that's in your guide scope's field of view and monitor's its position. As the mount drifts over time, the camera will then send corrective signals back to the mount to compensate and try to keep the guide star at the exact same position on its sensor.
It's possible to shoot shorter exposures of deep sky objects without guiding, but only when using an auto-guider will you be able to track the sky accurately for more than 1-2 minutes, depending on the focal ratio of the scope you're using. If you're serious about getting a lot of detail in your deep sky images, this is an essential piece of equipment.
It's possible to shoot shorter exposures of deep sky objects without guiding, but only when using an auto-guider will you be able to track the sky accurately for more than 1-2 minutes, depending on the focal ratio of the scope you're using. If you're serious about getting a lot of detail in your deep sky images, this is an essential piece of equipment.
Dew Control
If you're in a humid climate and using a scope with a lens at the front, you will eventually collect dew on your lens. This will ruin an imaging session in a hurry. Electric dew control solutions are available. If you can't immediately afford dew heaters, refer to my article Dew Control, Ghetto Style for an alternate, cheap solution. It may look silly, but will keep your optics dew-free.
Power Supply
This is an essential part of using your equipment. If you're practicing your craft in your back yard or where power is available, then this isn't an issue. And extension cord and power bar will keep you running all night. But if you need to travel, portable power is a necessity. You need to make sure that whatever you use can power your equipment for the duration of your session. Keep in mind that laptops and dew heaters will tend to drain any battery very quickly.
Computer
Depending on your setup, you may or may not need this. If you have a standalone auto-guider and are using a remote of some sort for you camera, you can do without. Otherwise, you'll need a Windows-based computer. Like for solar system imaging, you don't need anything overpowered. I also use my same old netbook for this task.
Conclusion
Much of this may sound complicated and expensive. And in many cases, it is. If you get into astrophotography in any serious way, you will for out a lot of money for different equipment. But don't let the lack of equipment stop you! There are inexpensive ways to have fun taking images of the night sky with a telescope. Inexpensive mounts will allow you to attach a smartphone to an eyepiece of a telescope and let you take pictures that way. They may not be publication or print-quality images, but they will definitely be suitable for your Instagram or Facebook accounts. It's more about making the best of what you have than having the best of everything.
So go out, have fun, and take some pics of the night sky.
Have questions or comments? Leave them below or come on over to my Facebook page at http://fb.darkartsastro.ca and post a comment.
Until next time, clear skies and keep your eyes and lenses pointed skywards.
So go out, have fun, and take some pics of the night sky.
Have questions or comments? Leave them below or come on over to my Facebook page at http://fb.darkartsastro.ca and post a comment.
Until next time, clear skies and keep your eyes and lenses pointed skywards.

