
 |
| My rig all set up with all its wiry glory |
On a side note, I've bought some velcro cable ties, so next time that won't be an issue. But needless to say, for this evening, I had to deal with this tangle of wires the best I could. It wasn't pretty, but it worked. I've got a better setup planned for next time that will result in the laptop sitting in the warm car with me.
It took a lot longer than it typically takes me to set up this new rig. There was so much to connect. In my head, I knew what needed to be done and it isn't terribly complicated. But actually doing it always presents some challenges in themselves. I did manage to get everything connected the first time without issues though. It just took me a lot longer to get it all sorted out than it typically does. Finally, I was polar aligned, the scope was aligned with 2 stars + 4 calibration stars. I got my focus on Vega using Backyard Nikon, and I was ready to fire up PHD and test out my new autoguider.
 |
| NOISE!!! |
So I made a quick post to the Amateur Astrophotography Magazine Facebook group. I knew there would be someone that could help me out. And sure enough, responses started pouring in almost immediately. With some excellent advice from other more experienced imagers such as Mitchell Tubbs (East of Jupiter), Bubba Daniels, David Pointer, and Phil Quandt who use autoguiders, I finally managed to get my autoguider working. Thanks for the tips, gentlemen. You got me off on the right track!
It turns out my primary issue was that my exposure times were too short. I guess while playing around with PHD at home, I had set the exposure time to 0.2 seconds and left it there. That really wasn't long enough of an exposure to register images of the stars or even to get focus with in the first place. Once I managed to acquire an image with the autoguider using Vega as a target, I managed to get my guide scope in focus. Once I had that, things started going smoothly at last. Once PHD calibrated, I was good to go.
My tracking graph in PHD was a little erratic. Not terrible by any means. My images did turn out quite well and my stars are perfectly round, so it looks like everything is within good tolerances, but the tracking wasn't quite as smooth as I'd seen on other peoples' tracking graphs. I'm not sure what the exact cause of this is. My mount was properly polar aligned, or at least I think it was. I'll have to be more careful aligning it next time to see if that helps
My first order of business was to test out the tracking now that I had the autoguider. Previously, I'd been unable to track using this scope at f/10 for more than 90 seconds without getting some trailing. So it was time to put things to the test. The first target of the night was M81 with 300 second exposures. I'd shot this target before using this scope. However, I had shot it at f/6.3 using my focal reducer and had shorter exposures.This time, I wanted a higher power view of the galaxy solo. I got over an hour of data on it, but for some reason, neither DeepSkyStacker nor MaximDL will read about half of the exposures. I'm not sure what the issue is there, as they should all be good. But in any case, for the test run, it worked out well. I got a fairly decent view of it. Nowhere near as good as I would have hoped, but since this was really just a test for my tracking, I'm pleased with the result.
 |
| Flickr link: https://www.flickr.com/photos/crunchmeister/15005613303/in/photostream/ |
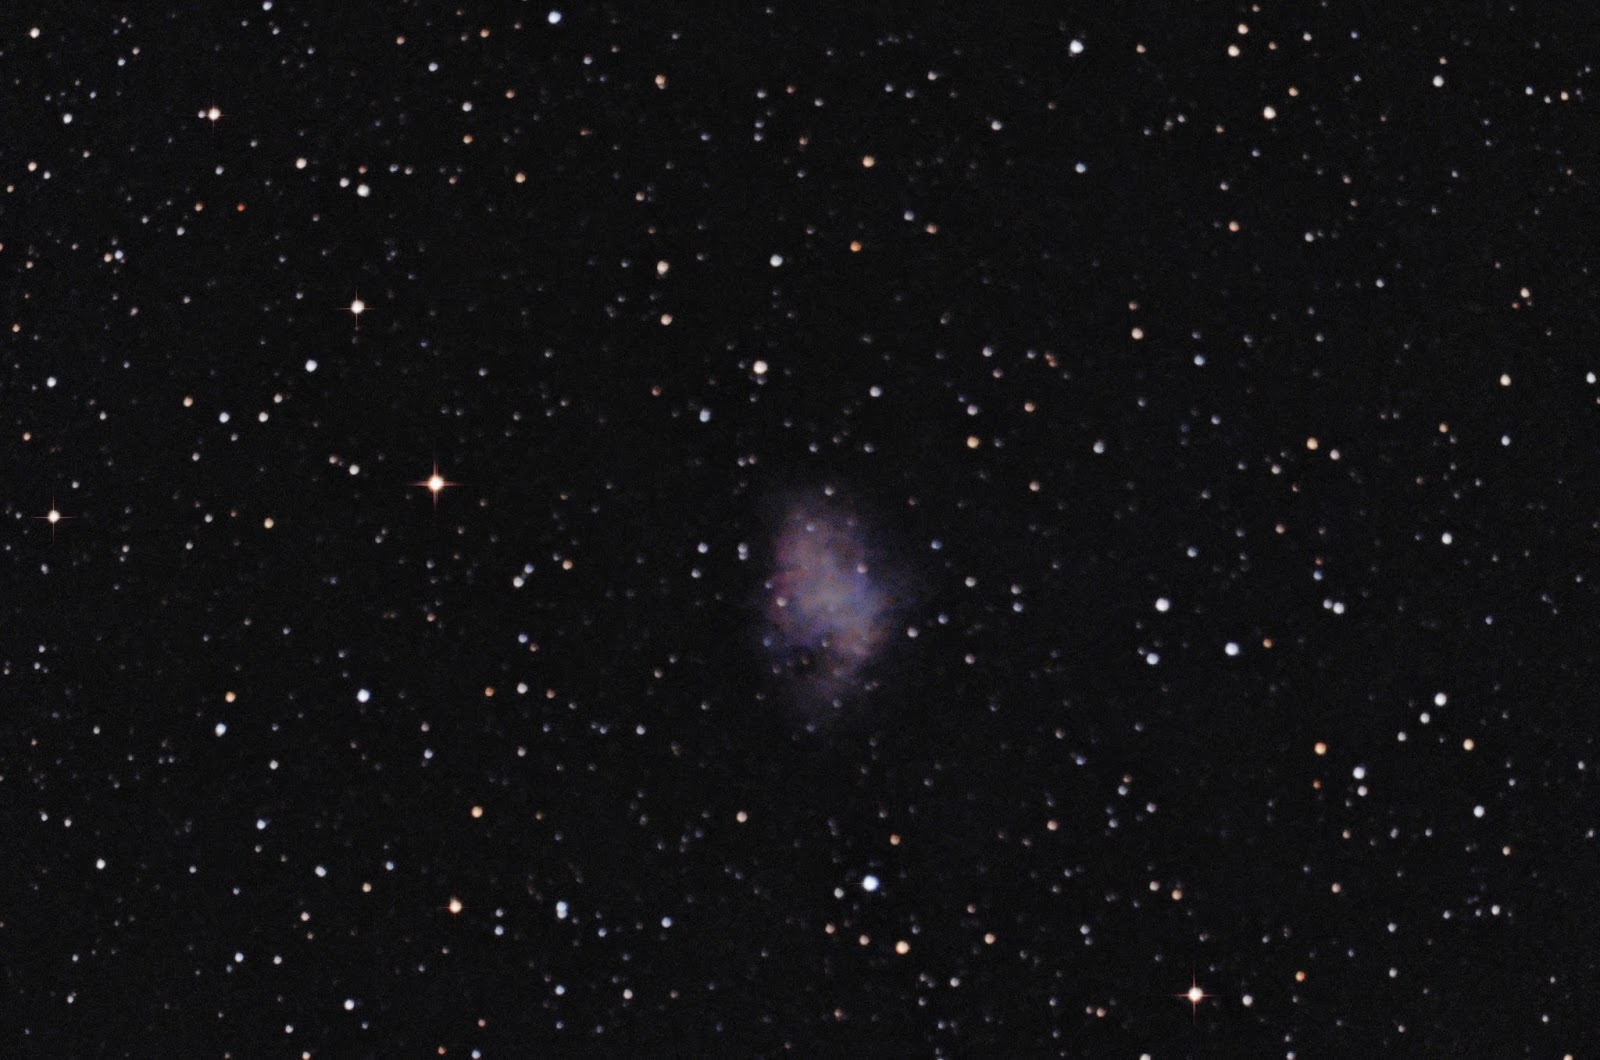
The second target for the night was one I had never shot or seen before - M1, the Crab Nebula. I'd been wanting to get a shot of this one for a while now, and I figured this was as good a time as any to do it. I was hoping for something better, but unfortunately, it seemed my focus was off. Normally I try to refocus between targets, but I didn't this time. I got 8 shots of it, but 6 of them were quite blurry and didn't make it into the final image. I didn't think it was quite good enough to post up on my Flickr page, but it was good enough to at least share on my Facebook page as a "failed attempt".
 |
| Facebook link: http://on.fb.me/1zcmxgj |
I had originally intended on getting more of M1 than I did, but realized that Orion had risen. And my ADD kicked in, making me want to switch targets. All in all, considering my focus was off on M1 and I didn't realize it, that wasn't a bad idea. My dilemma was now whether to shoot M42, the Horsehead Nebula, or Flame Nebula. All 3 are amongst my favourites. Having already managed good shoots of M42 and Flame in the past, I decided I'd turn the light gathering capability of my scope on the Horsehead, since I had never gotten an image of it that was to my satisfaction.
 |
| Flickr link: https://www.flickr.com/photos/crunchmeister/15439212238/in/photostream/ |
The detail that I managed to pull out of this left me pretty impressed. Like my image of M81, there's a grainy finish. It's not so much due to noise, but rather the lack of data. While the Horsehead is clearly visible with bright red shades, there are a lot of gaps in my data due to the short integration time. A mere 30 minutes of exposure time at f/10 is not enough to capture this dim object and all the subtle gas clouds surrounding it. But still, I was very impressed. In previous shots of this object, I had actually been shooting the Flame Nebula with my camera and a 300mm lens or with my widefield f/5 refractor. While I managed to capture the presence of the Horsehead, detail on it was never clear. This time, I clearly captured it, despite the "noisy" appearance. Far from perfect, but the level of detail here is impressive.
Lessons learned
While the imaging from this session is far from what I'd call spectacular, it was a successful evening out nonetheless. I learned to properly set up and use my new equipment, which is always my goal the first time I'm out with new gear. But the real successes of the evening were the lessons I walked away with.
- Autoguiders are great! They require some extra work to set up, but once set up properly, they're essential for long exposure photography and will do a wonderful job of keeping your mount tracking.
- Take extra care to polar align the mount as accurately as possible, including doing a second polar alignment after my 2+4 mount alignment is complete.
- F/10 is a difficult ratio to image at, especially when you have a 2m focal length. I now know I need a lot more integration time to get clear images out of my setup at f/10, Chances are I'll likely stick with f/6.3 using my reducer for most of my imaging. It will be a lot more forgiving and will allow me to get more complete images in less time.
- Take the time to re-focus between targets to ensure good images. Had I done it in this session, I would have had a semi-decent image of M1.
So until next time, clear skies and keep your eyes to the sky.
No comments:
Post a Comment